How to Make Your GitHub Profile Stand Out

- 设置与用户名同名的公开仓库可创建个人主页README
- 完善地理位置、社交链接等资料增强可信度与可发现性
- 用简洁故事化语言在README中展示项目亮点和个人兴趣
If you have a Github profile, you might overlook the many ways you can customize it – and that's completely understandable. After all, at its core, GitHub is a home for your code.
But beyond repositories and commits, your profile can say _a lot_ about you as a developer.
When used intentionally, GitHub becomes more than a code hosting platform. It becomes your **CV for your codebase**. It tells your story, showcases your skills, and gives people a reason to trust your work.
In this article, we'll break down the different ways to make your GitHub profile stand out. From setting up your GitHub account to engaging storytelling for your repositories, there's lots you can do.
Let's get started!
Table of Contents
Step 1: Sign Up for a Github Account
To begin, you'll need a GitHub account. If you don’t have one, you can set one up here.
Once you have your account set up and you're logged in, we can move on to the next step.
Step 2: Add a Profile Image
Your profile image is often the first thing people notice. It could be a professional photo of yourself, or an image or avatar that represents you or your interests
As long as it’s appropriate, you’re good to go.
To add a profile image, you'll need to:
- Open your profile menu/dashboard
- Click on the image icon at the left
- Click on the edit text on the image icon
- Select the image to set as your profile picture
- Click the "Set new profile picture" button
So, you should have something like this:
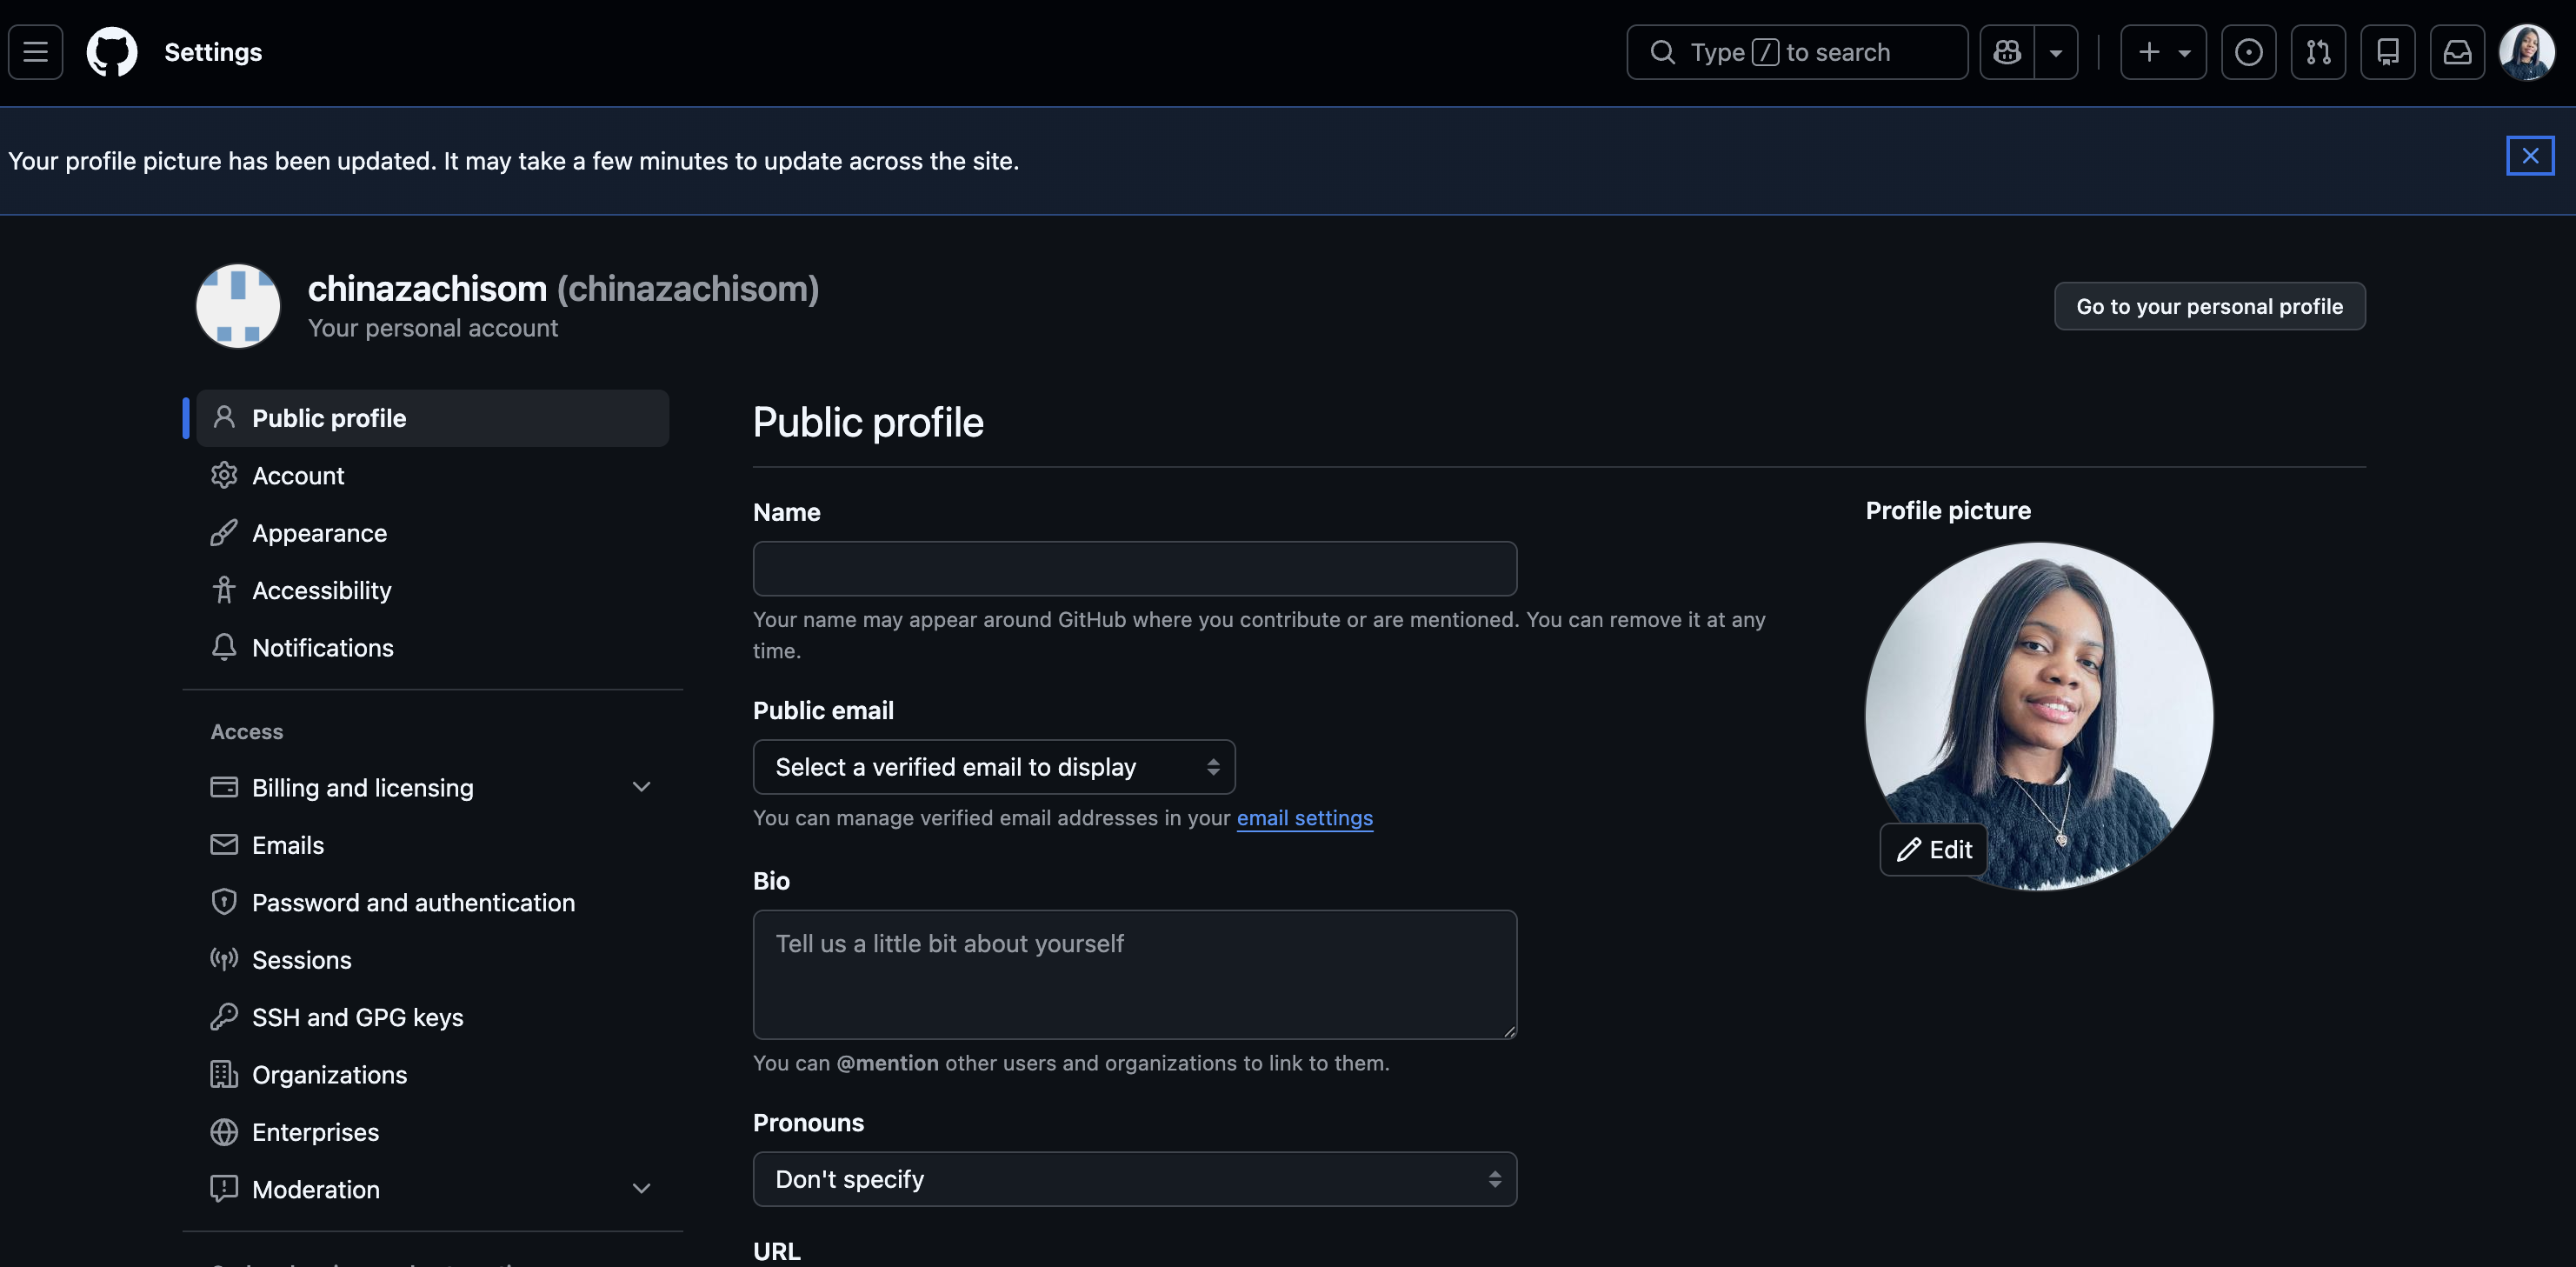
**GitHub link to this page:**https://github.com/settings/profile
And there you have it, your GitHub profile image is set.
On to the next one…
Step 3: Add Profile Details
This step is all about credibility and discoverability.
At the center of your profile settings you'll see fields like email, location, social media links and so on. We'll be adding those details so you can take advantage of the discoverability it lends to your profile.
**GitHub link to this page:**https://github.com/settings/profile
For this step, you'll want to add as much detail as possible (apart from your home address – I think we both know why).
For the location, you can just put in your city or country so others have a general idea of where you are in the world.
Step 4: Add a Profile README File
This is where you introduce yourself properly and tell your story.
A **Profile README** is a special repository named exactly the same as your GitHub username. Your README file appears directly on your profile page.
The READme should answer the following questions:
- Who are you?
- What are your project highlights?
- What are you currently working on or learning?
- Your hobbies or interests (optional)
While answering these questions, you should aim to keep it minimal and yet interesting. You don't want to overwhelm the visitor.
Here's how to create your README:
- Click New repository
- Name the repository exactly the same as your GitHub username
- Check “Add a README file”
- Make sure the repository is public
- Click Create repository
Profile README file setup:
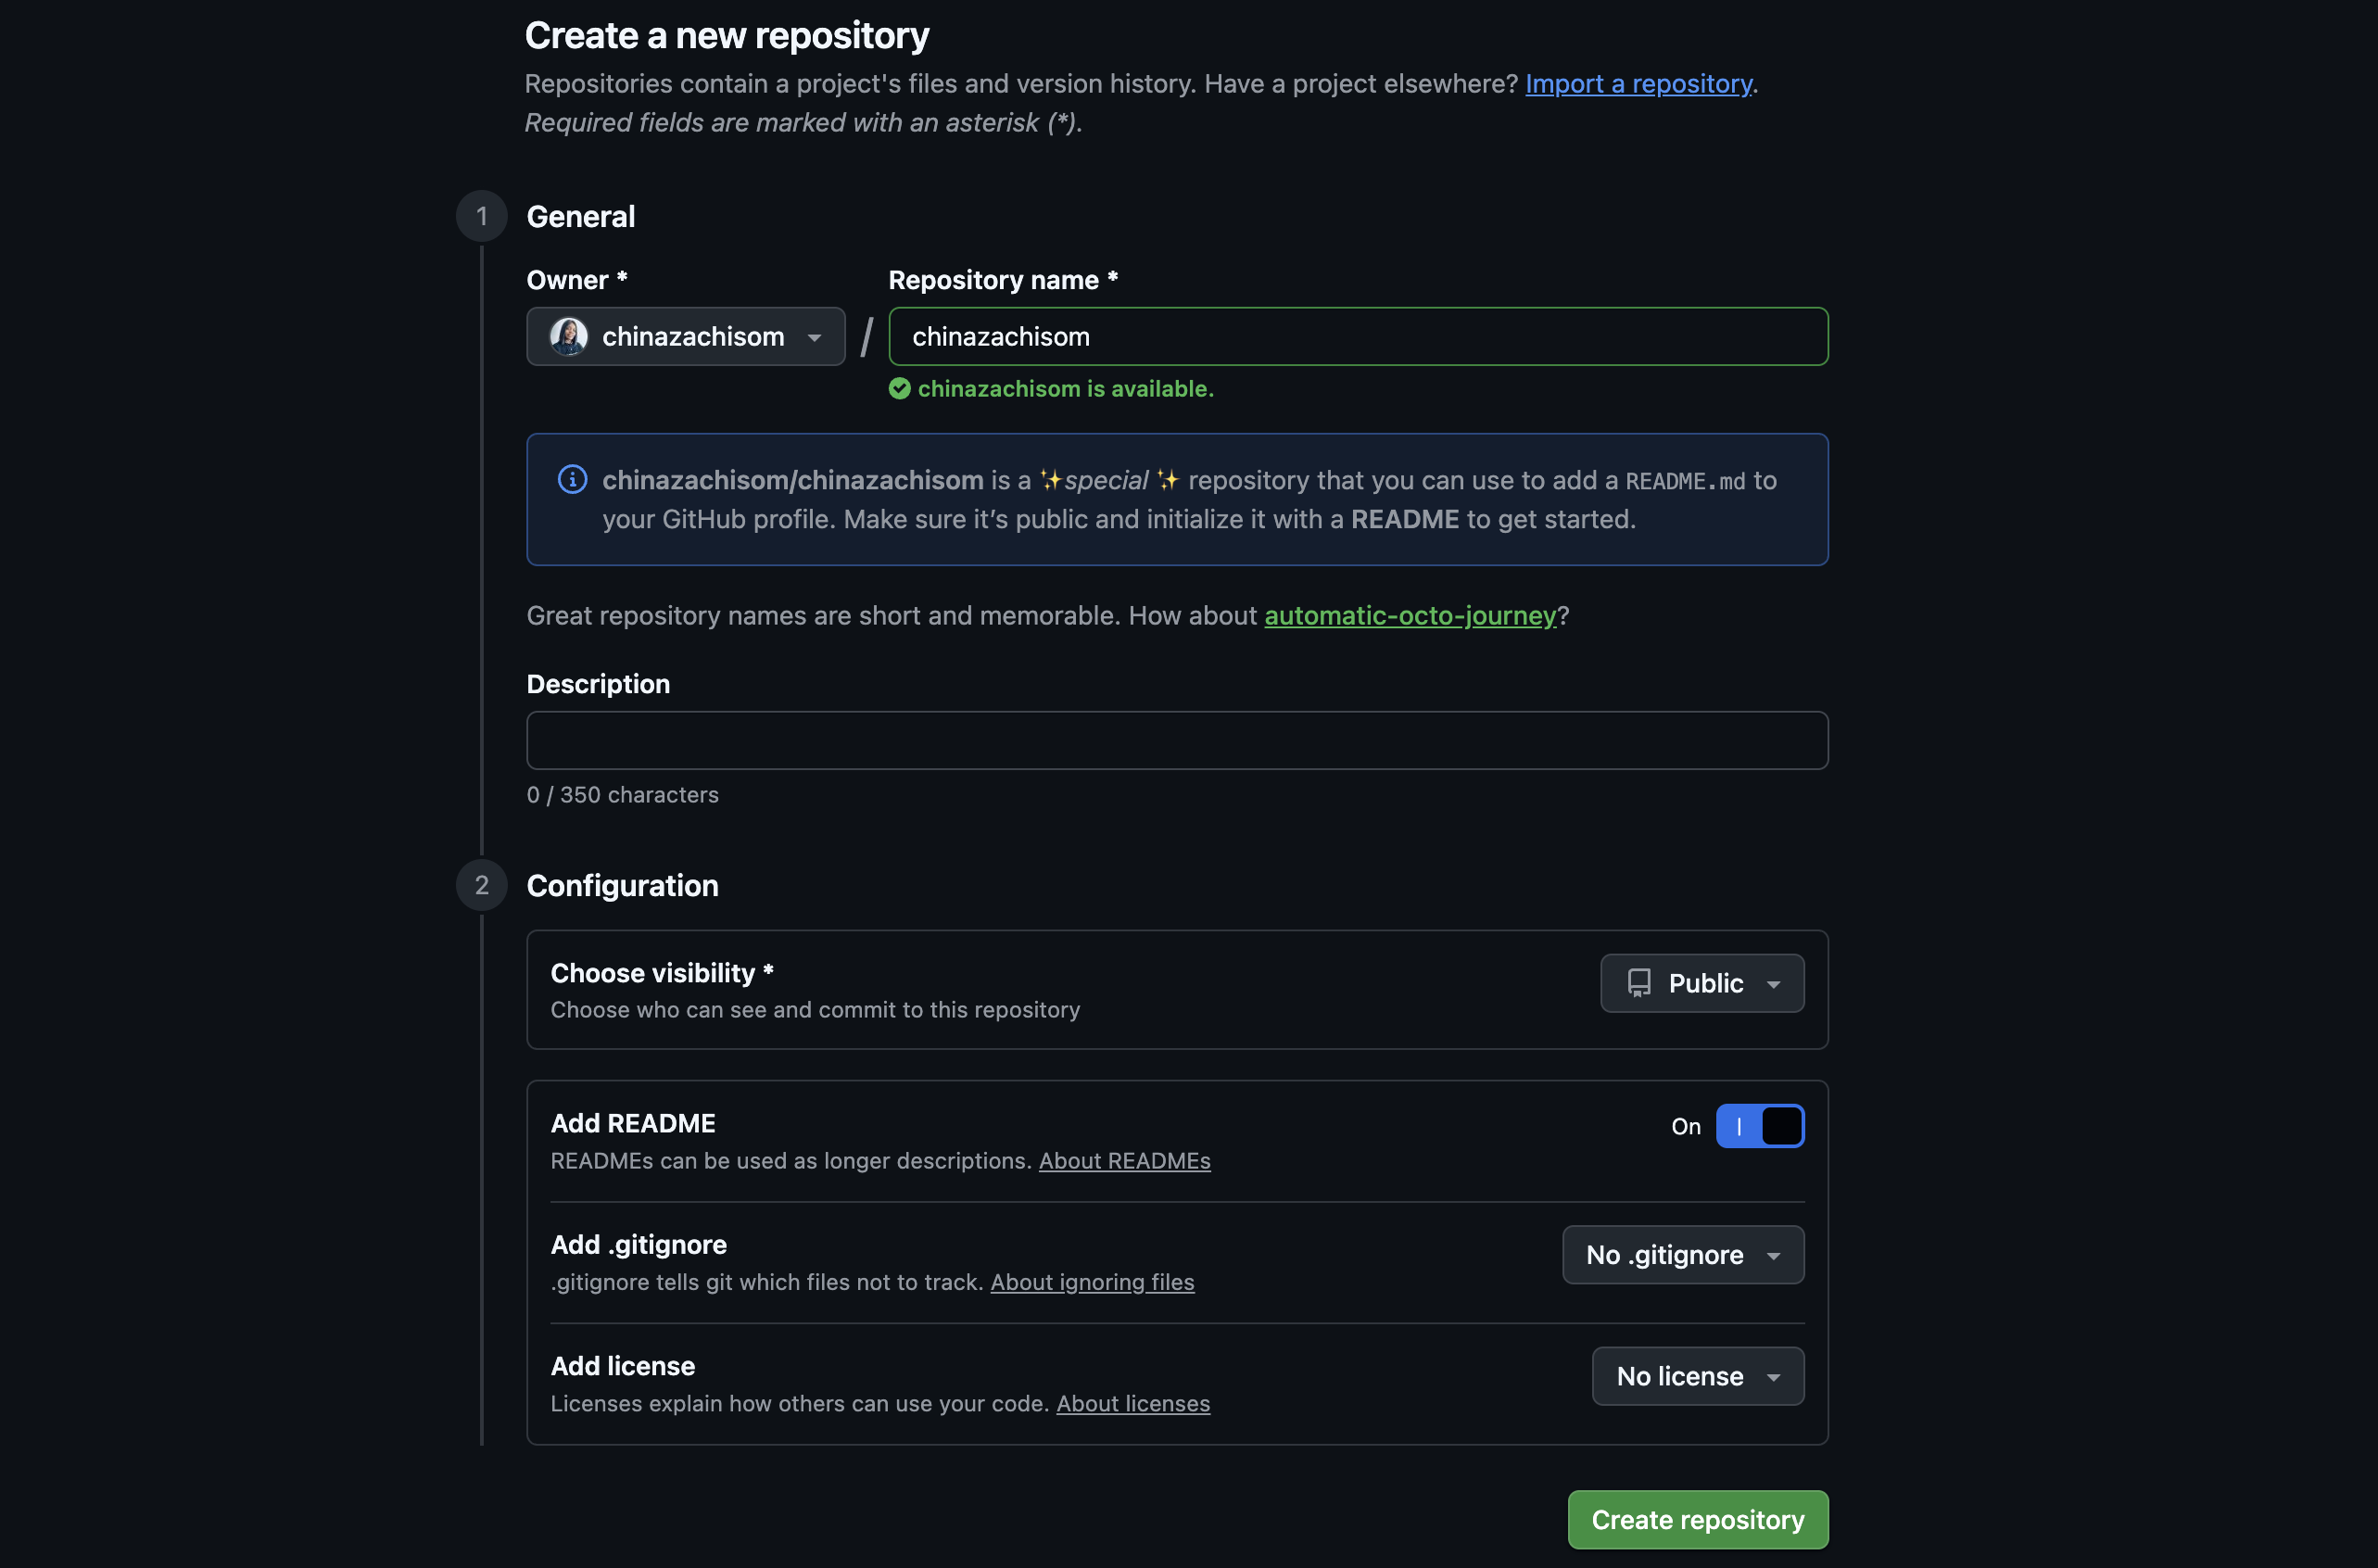
**GitHub link to this page:**https://github.com/new
So if you answered the questions listed above, your README file should look something like this:
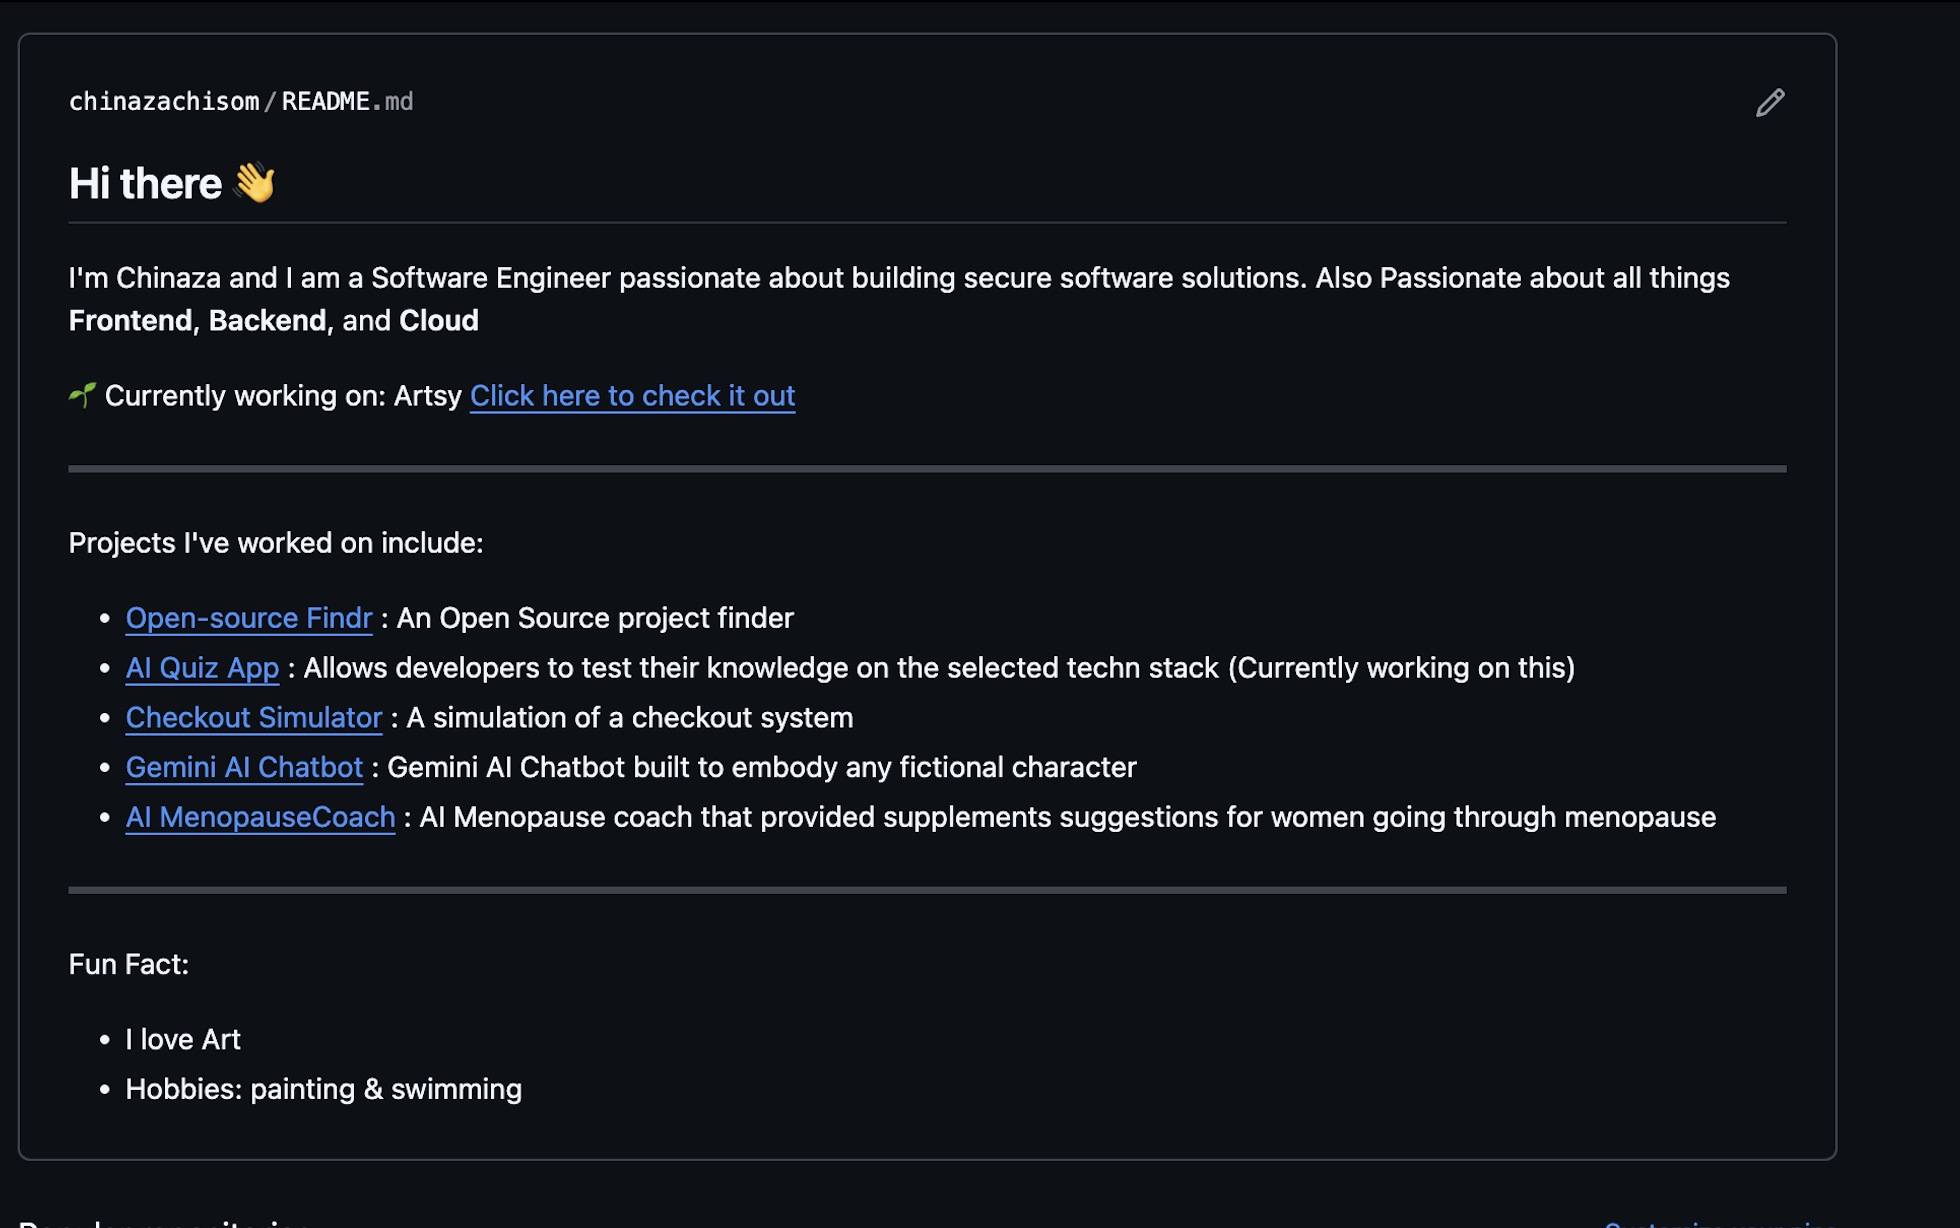
**GitHub link to this page:**https://github.com/chinazachisom/chinazachisom
It should also be showing directly on your GitHub profile like below:

**GitHub link to this page:**https://github.com/chinazachisom
Step 5: Tell a Story About Each Repository
Now, this is where you can tell a story about each of your repositories using a README file.
**NB: Each repository should have its own separate README file.**
What to include in a repository README:
- Project title
- What the project is
- The purpose (the “why”)
- Key features
- Challenges you faced and how you solved them
- Setup or usage instructions (or a live link if hosted)
- Technical concepts used (e.g., throttling, caching, lazy loading) _(optional)_
- Images or video demos
You may also include badges, charts, contribution graphs or other visual enhancements that help highlight project quality, activity and impact.
With the above structure, you can tell the stories behind your projects, show your problem-solving skills, and make your work easier to understand and evaluate.
**Repository README File Sample:**
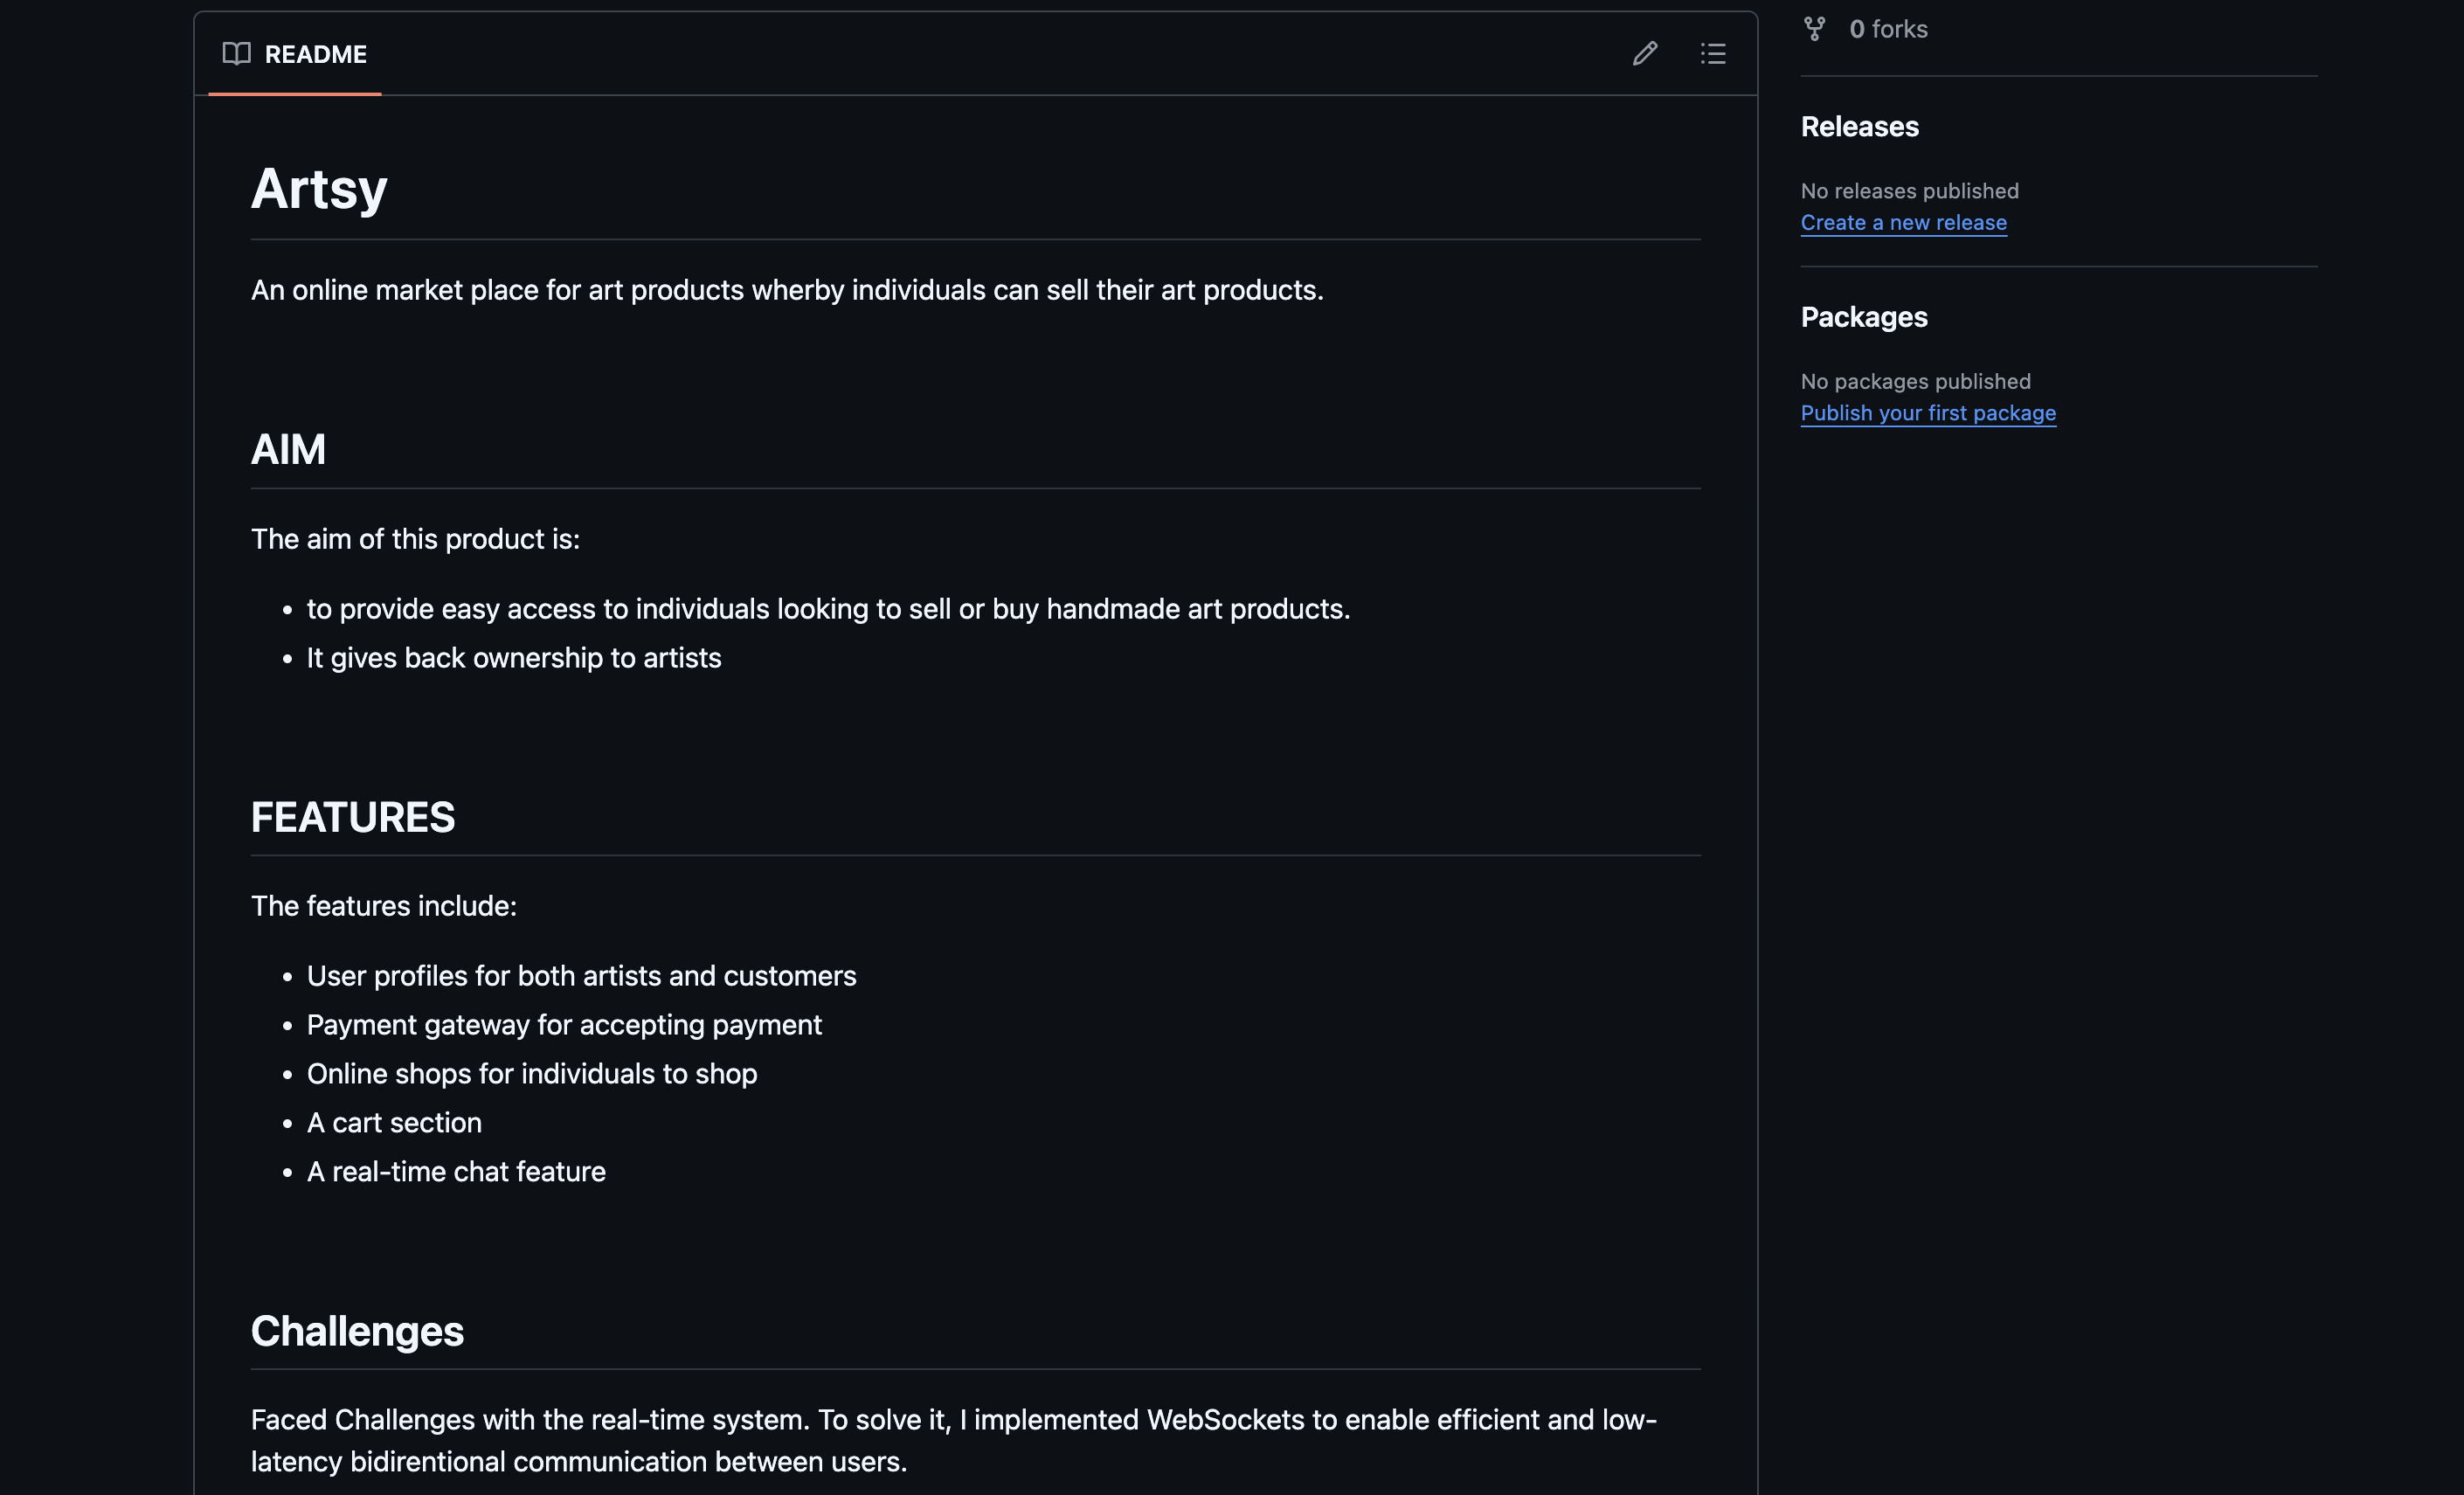
**GitHub link to this page:**https://github.com/chinazachisom/Artsy
Conclusion
Your Github Profile is more than just a storage space for your codebase. It's your developer Identity as well.
Following these basic steps can help turn your Github into a portfolio infused with your personal brand. It makes your GitHub Profile stand out, which can help open doors for more opportunities.
Treat it like a CV for your code and let your work speak for you.
About the Author
Hi there! I'm Chinaza Chukwunweike, a Software Engineer passionate about building robust, scalable systems that make a real world impact. I'm also an advocate for continuous learning and improvement.
If you found this useful, please share it! And follow me for more Software Engineering tips, AI learning strategies, and productivity frameworks.
- * *
- * *
Learn to code for free. freeCodeCamp's open source curriculum has helped more than 40,000 people get jobs as developers. Get started
问问这篇内容
回答仅基于本篇材料Skill 包
领域模板,一键产出结构化笔记论文精读包
把一篇论文 / 技术博客精读成结构化笔记:问题、方法、实验、批判、延伸阅读。
- · TL;DR(1 段)
- · 研究问题与动机
- · 方法概览
投融资雷达包
把一条融资 / 创投新闻整理成投资人视角的雷达卡:交易要点、判断、竞争格局、风险、尽调清单。
- · 交易要点(公司 / 轮次 / 金额 / 投资人 / 估值,材料未明示则写 “未披露”)
- · 投资 thesis(这家公司为什么值得关注)
- · 竞争格局与替代方案